
On this page
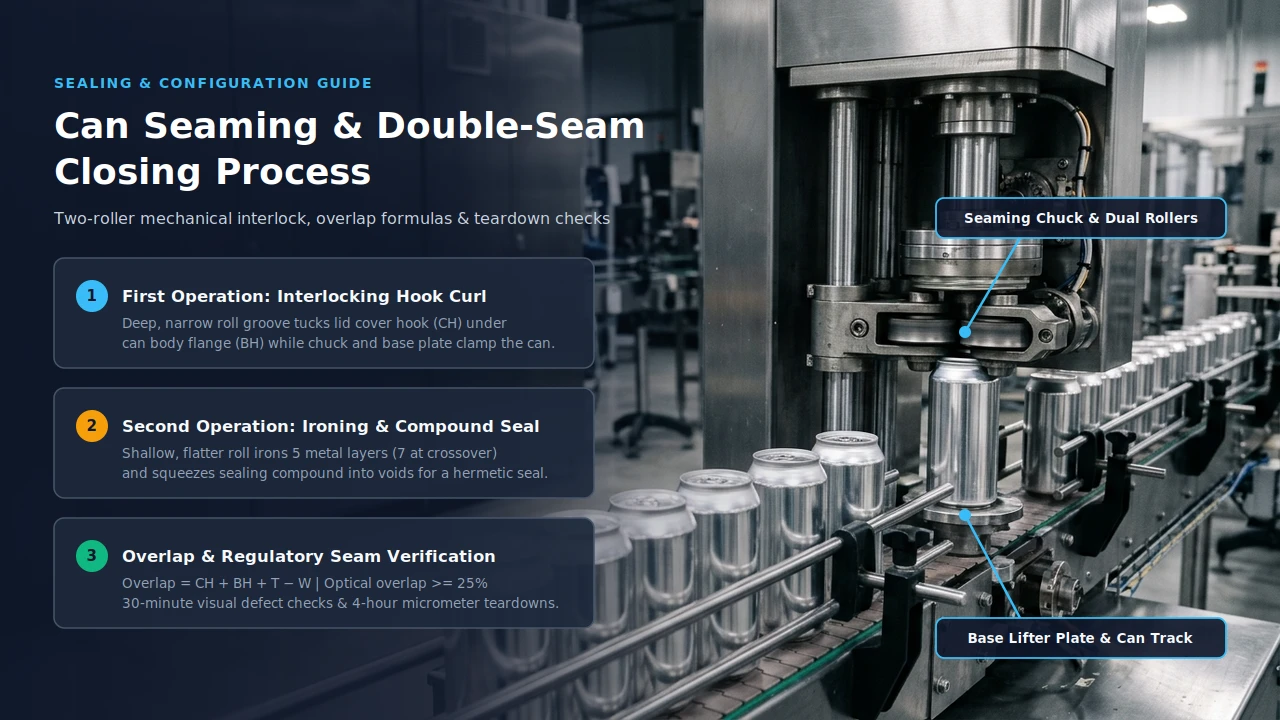
Can seaming closes filled cans in two roller steps, interlocking the lid curl and body flange before compressing the compound into a hermetic double seam.
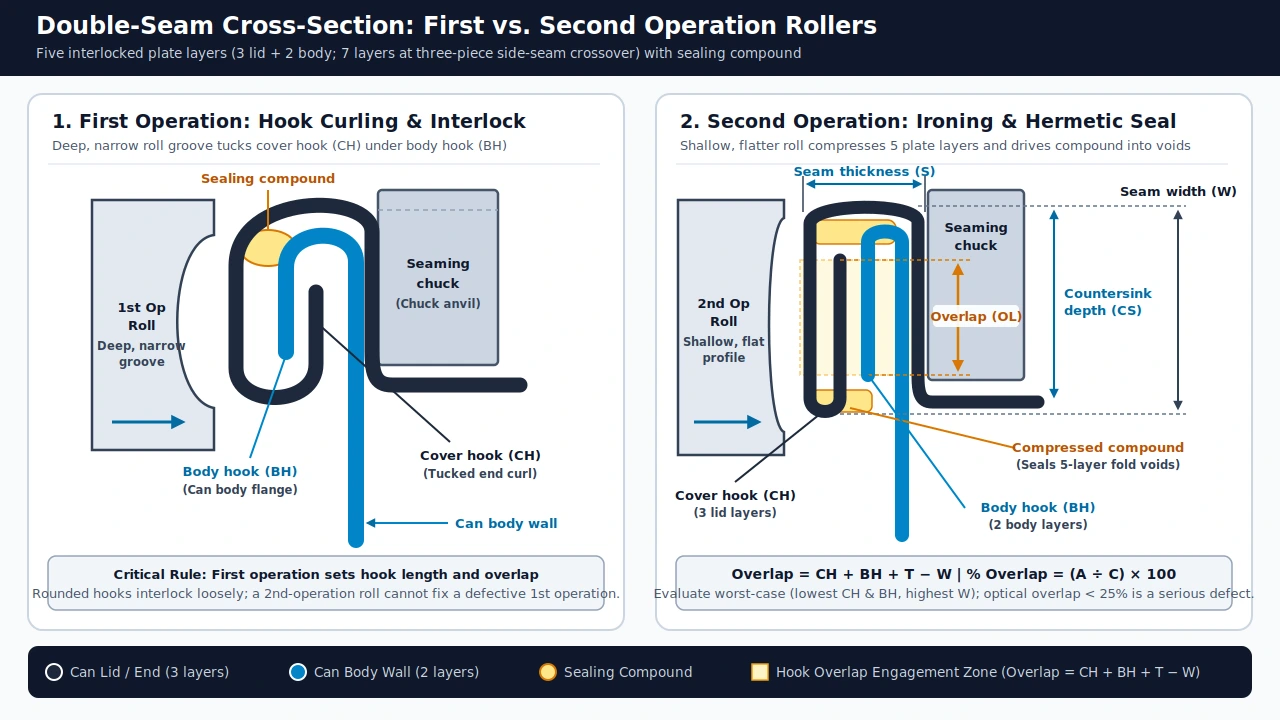
Can seaming is the mechanical closing operation that joins a curl-edged lid (can end) to a flanged cylindrical metal or composite can body in two sequential roller passes to create a five-layer hermetic double seam—or seven layers where the end crosses the side seam on a three-piece soldered or welded can, and six layers at the key tab of a key-open can. During the first operation, a deep, narrow grooved roller tucks the lid cover hook (CH) underneath the downward-turned can body hook (BH) so the cover hook is rounded and the ends of the two hooks sit essentially parallel. During the second operation, a shallower, flatter roller irons those interlocked layers against the seaming chuck and squeezes the end sealing compound into the seam voids so the closure stays secure against the entry of microorganisms.
Across food, powder, and beverage packaging lines, can seaming machines perform this closing step after the filler discharges product into the open container. Seam integrity is verified by measuring cover hook (CH), body hook (BH), seam width (W), seam thickness (S), and countersink depth (CS), calculating engagement from Overlap = CH + BH + T − W (or optical % Overlap = A ÷ C × 100, where optical overlap below 25% of internal seam length is classified by the Canadian Food Inspection Agency, CFIA, as a serious double-seam defect).
How Do First and Second Operation Rollers Form a Double Seam?
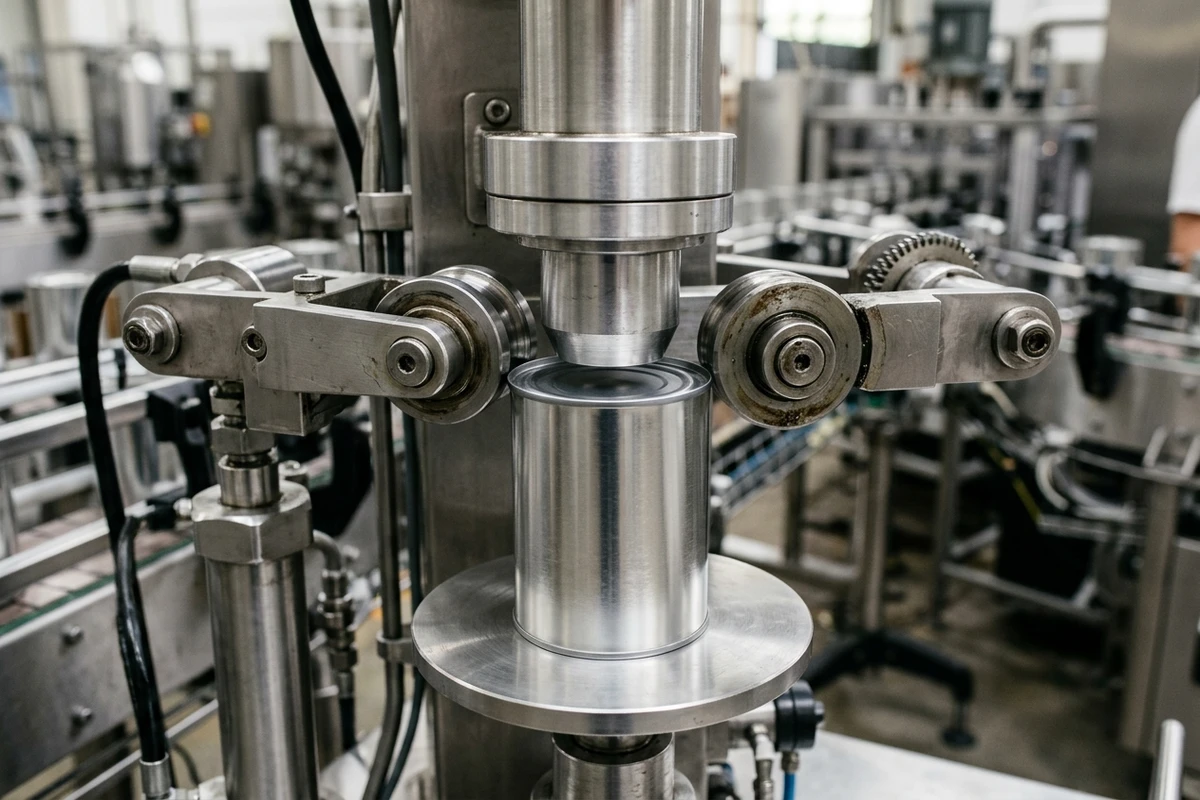
A double seam is formed while the filled can is clamped axially between the base lifter plate below and the cylindrical seaming chuck seated inside the lid countersink above. The first-operation roller uses a deep, narrow groove profile to roll the lid curl inward and underneath the can body flange, forming rounded cover and body hooks while keeping the sealing compound inside the curl pocket. Because the first operation establishes hook length and overlap geometry, an improperly formed first-operation seam cannot be corrected by the second-operation roller.
Once the first-operation roller withdraws, the second-operation roller advances with a shallower, flatter groove profile that compresses the three lid layers and two body wall layers against the chuck anvil. This ironing pass flattens the rounded hooks into tight mechanical contact and drives the sealing compound into the voids between the five plate layers (and across the seven-layer lap on three-piece cans).
| Stage or parameter | Roller & plate geometry | Setup & inspection check |
|---|---|---|
| First operation | Deep, narrow roll groove tucks lid curl under body flange into rounded parallel hooks. | Sets cover hook (CH) and body hook (BH); second operation cannot fix a bad first pass. |
| Second operation | Shallow, flatter roll groove compresses five plate layers (seven at three-piece crossover). | Irons hooks tight against the chuck and forces sealing compound into internal voids. |
| Cover hook (CH) & Body hook (BH) | CH is the tucked lid curl length; BH is the turned-down can flange (one FDA example guideline is 0.072–0.088 in). | Measured at 3 teardown points ~120° apart; the FDA Part 3 example treats a 0.071 in body-hook low and a 0.076 in high as a case that can continue when overlap, wrinkle, and pressure ridge stay inside the guideline. |
| Seam width (W) & thickness (S) | W is axial seam height along the can wall; S is radial thickness across compressed layers. | Tinplate cover thickness (T) is 0.010 in in general FDA Part 3 overlap calculations. |
| Overlap (OL) & Countersink (CS) | Overlap = CH + BH + T − W, or optical % Overlap = (A ÷ C) × 100; CS is the depth from the top of the seam to the countersink radius. | Optical overlap below 25% of internal seam length is a serious CFIA double-seam defect. |
How Do You Measure Seam Overlap and Run Teardown Checks?
Seam overlap measures how far the cover hook and body hook interlock vertically inside the finished seam. When evaluating seams with a micrometer, calculated overlap is determined by Overlap = CH + BH + T − W, where T is cover thickness (0.010 inches in general tinplate practice) and worst-case overlap is calculated from the lowest CH, lowest BH, and highest W measured on that can rather than averaging the readings. When evaluating a cross-section with an optical seam projector or scope, percentage overlap is measured directly as % Overlap = (A ÷ C) × 100, where A is the overlap length and C is the internal seam length; CFIA classifies optical overlap below 25% as a serious defect, states that overlap calculated by formula is only an estimate, and states that the 70% body-hook butting experience figure cannot substitute for an overlap measurement.
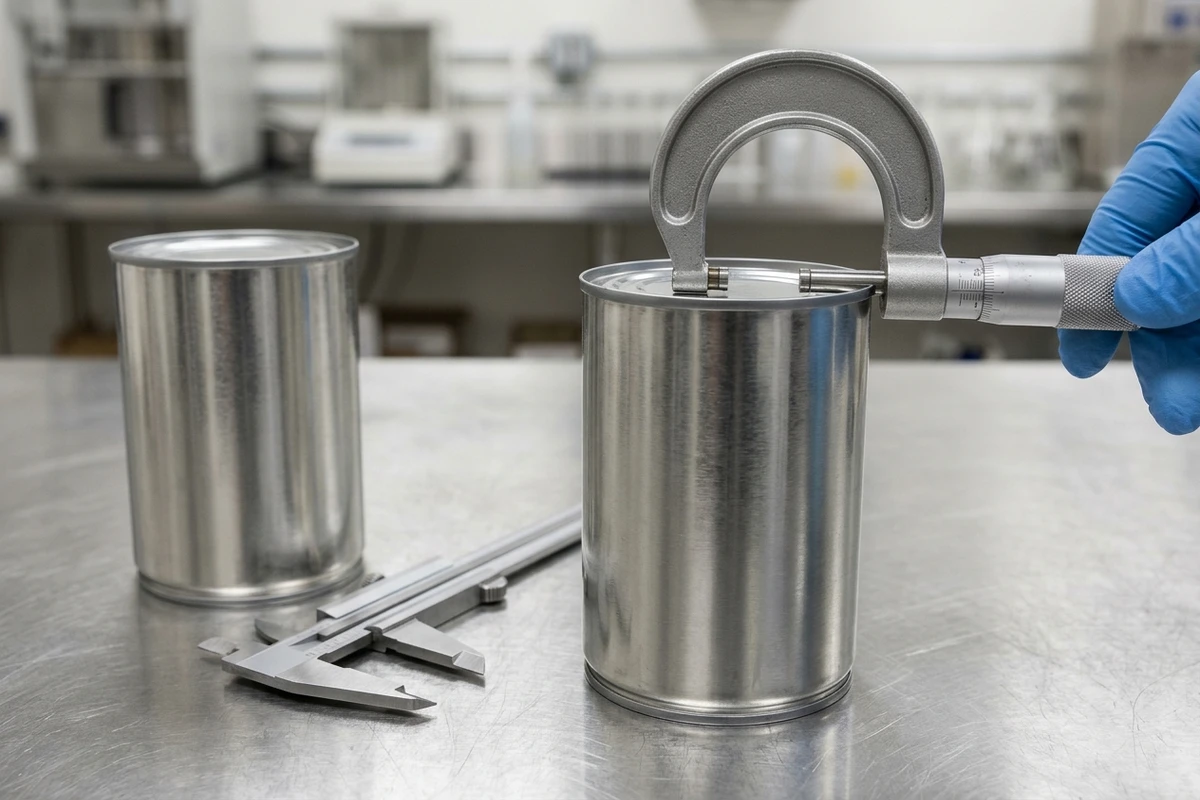
Under 21 CFR 113.60 and 9 CFR 431.2, a qualified inspector should visually examine at least one can from each seaming head at intervals not exceeding 30 minutes, and must inspect again immediately after a can jam, a seaming-head adjustment, or startup after a prolonged shutdown such as an overnight 6:00 PM to 8:00 AM stop, while a qualified individual records destructive teardown inspections at intervals not exceeding 4 hours. Cylindrical can micrometer teardowns record cover hook (CH), body hook (BH), seam width (W), seam thickness (S), and tightness (wrinkle rating after stripping the cover hook) at three points approximately 120° apart and at least one-half inch away from the side-seam juncture (or at two points by optical scope), and written records under 21 CFR 113.100(c) name the product code, inspection date and time, the measurements, and any corrective action, compared with the can supplier's seam guidelines that sample testing can confirm on the cans you will run.
What Causes Common Double-Seam Defects Like Cutover and False Seams?
External visual checks and 4-hour teardowns target cutover, skidding or deadheading, false seam, droop, and a broken chuck, the closure defects named in 21 CFR 113.60 and the FDA Low-Acid Canned Food Inspection Guide, Part 3, which CFIA metal can defect standards also classify. Because container dimension guidelines serve as setup and maintenance aids, final seam acceptability rests on total evaluation across visual, micrometer, and stripped-hook checks by a qualified person.
| Seam defect | Physical appearance | Mechanical cause & inspection check |
|---|---|---|
| Cutover (sharpness) | Sharp metal fin or fractured edge on the top inside wall of the seam above the chuck. | Excess metal forced over the top of the seaming chuck; detected by 30-minute visual and finger check. |
| Deadhead (skidding / spinner) | Incomplete double seam around part of the lid circumference. | The chuck spins or slips in the countersink and leaves part of the seam incomplete. |
| False seam (knocked-down flange) | Portion of seam where cover hook and body hook fail to interlock (zero overlap). | A bent body flange or damaged end curl leaves the hooks unengaged, and an external look can miss it until teardown. |
| Droop at crossover / lap | Smooth projection extending below the normal bottom line of the double seam. | Appears where the seam crosses the seven-layer side-seam lap, and cover-hook droop there is rated after stripping the cover hook. |
| Broken chuck mark | An irregularity on the countersink wall where that part of the seam is not ironed tight. | A chipped seaming-chuck lip leaves that spot loose; inspect the countersink wall visually every 30 minutes. |
When Should You Choose Hand-Loaded, Vacuum, or Servo Can Seamers?
Selecting a can seamer starts with container handling kinematics, closing atmosphere (air, vacuum, or vacuum with nitrogen), and line speed. On our hand-loaded LV-135C semi-automatic electric seamer, one operator closes 15–20 cans/min (50–126 mm diameter, 50–200 mm height) in atmospheric air using an electric drive with no compressed air required, whereas the conveyor-fed automatic servo can seamer indexes containers on a servo table at 30–45 cans/min in air (>= 0.4 MPa compressed air). When closing liquids or fragile products, our LV-135B semi-automatic vacuum seamer (4–8 cans/min down to -0.060 MPa vacuum, 50–130 mm diameter, 32–185 mm height) holds the can stationary on the base plate while the first- and second-operation rollers orbit around the chuck so the product does not slosh or spill.
For oxygen-sensitive products, the conveyor-fed LV-135ZFG automatic vacuum seamer runs at 25–35 cans/min depending on the can, product, and fill level (>= 0.4 MPa compressed air, vacuum level agreed per project), while our automatic vacuum-nitrogen can seamer closes 73–127 mm diameter (50–200 mm high) cans at 4–8 cans/min with residual oxygen below 3% (0.6–0.8 MPa compressed air). The automatic vacuum-nitrogen seamer runs at a lower cycle rate than the hand-loaded LV-135C because each can seals inside the chamber, evacuates air, and flushes with nitrogen before the rollers form the double seam; machine scope on can seaming machines is therefore driven by chamber vacuum and gas hardware, format change parts (chuck, rollers, and guides per can diameter), upstream filling machines, and downstream bottle and can labeling machines.
Sources
- 21 CFR 113.60 — Thermally Processed Low-Acid Foods Packaged in Hermetically Sealed Containers: Containers (eCFR)
- 9 CFR 431.2 — Canning and Canned Products: Containers and Closures (eCFR)
- FDA Guide to Inspections of Low Acid Canned Food Manufacturers, Part 3 — Containers/Closures
- Canadian Food Inspection Agency (CFIA) — Metal can defects: identification and classification (hermetic container definition, five- and seven-layer double-seam structure, optical overlap formula, and 25% minimum overlap threshold)
Discuss your application with LINEVO.
Send can samples